Essential Maintenance Guide for High-Pressure Filter Housings: Mastering Filter Cartridge Replacement and Piping Maintenance
Introduction
High-pressure filter housings are critical components in various industrial applications, ensuring that fluids and gases are free from contaminants and impurities. Proper maintenance of these filter housings is essential to maintain system efficiency, prevent costly breakdowns, and ensure safety. This comprehensive guide will help you understand the key maintenance procedures, including filter cartridge replacement, piping maintenance, and leak detection, ensuring that your high-pressure filter housing operates at optimal performance.
Understanding High-Pressure Filter Housings
Key Components and Functions
A high-pressure filter housing typically consists of several key components:
- Filter Cartridge: The primary element that removes impurities from the fluid or gas.
- Housing: The container that houses the filter cartridge and provides a secure, pressure-resistant environment.
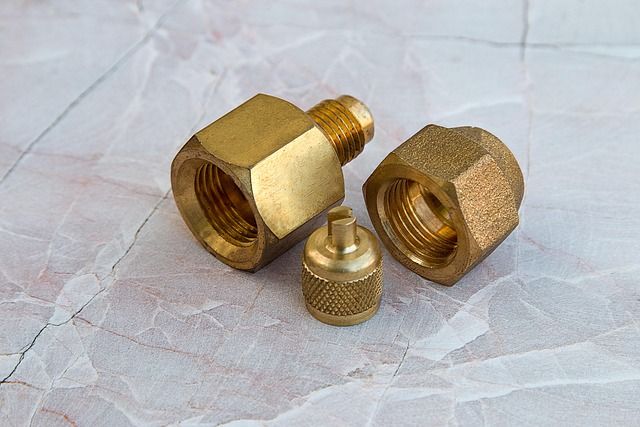
- Inlet and Outlet Fittings: Industrial fittings that connect the filter housing to the piping system.
- Seals: Essential for maintaining a pressure-tight seal and preventing leaks.
- Drain Valve: Allows for the removal of contaminants and maintenance of the system.
These components work together to filter fluids under high pressure, making them indispensable in industries such as oil and gas, pharmaceuticals, and chemical processing.
Filter Cartridge Replacement
Why Regular Replacement is Crucial
Filter cartridges can become clogged over time, reducing their efficiency and potentially causing damage to the system. Regular replacement ensures that the filter remains effective and prevents system failures. The frequency of replacement depends on the type of fluid being filtered, the operating conditions, and the filter's specifications. Generally, it is recommended to replace filter cartridges every 6-12 months or as soon as a significant drop in pressure is observed.
Step-by-Step Process for Filter Cartridge Replacement
- Shut Down the System: Before beginning any maintenance, ensure that the system is shut down and depressurized to avoid injury or damage.
- Prepare the Workspace: Clear the area around the filter housing and gather all necessary tools and replacement cartridges.
- Open the Housing: Release the pressure within the housing and open it to access the filter cartridge. Use appropriate tools to avoid damaging the housing seals.
- Inspect the Cartridge: Examine the used filter cartridge for signs of damage or excessive contamination. Note any issues for future reference.
- Remove the Cartridge: Carefully remove the old filter cartridge. Some systems may require specific tools for this step.
- Clean the Housing: Thoroughly clean the interior of the filter housing to remove any residual contaminants. Use a cleaning solution compatible with the materials of the housing and cartridge.
- Install the New Cartridge: Place the new filter cartridge into the housing, ensuring it is properly aligned and seated. Tighten any necessary connections without over-tightening.
- Reassemble and Seal the Housing: Close the housing and ensure that all seals are properly seated. Reapply any sealants as required by the manufacturer's guidelines.
- Restart the System: Gradually re-pressurize the system and check for any leaks or malfunctions. Monitor the pressure drop across the filter to ensure it is operating correctly.
Tips for Efficient Filter Cartridge Replacement
- Use Compatible Cartridges: Always use filter cartridges that are compatible with your specific filter housing and application.
- Follow Manufacturer Guidelines: Adhere to the manufacturer's recommendations for replacement frequency and procedures.
- Keep a Maintenance Log: Document each filter cartridge replacement, including the date, type of cartridge, and any issues observed.

Piping Maintenance
Importance of Piping Maintenance
The piping system connected to your high-pressure filter housing plays a vital role in overall system performance. Regular maintenance of the piping can prevent issues such as corrosion, blockages, and leaks, which can affect the filtration process and cause costly repairs. Proper piping maintenance also ensures that the system operates efficiently and safely.
Key Piping Maintenance Tasks
- Inspect for Corrosion: Regularly check the pipes for signs of corrosion, which can weaken the structure and cause leaks. Use a cleaning solution to remove any corrosion and apply a protective coating if necessary.
- Check for Blockages: Use a flow meter to detect any blockages in the piping. If a blockage is found, use appropriate cleaning methods to remove it, such as backflushing or chemical treatment.
- Maintain Proper Alignment: Ensure that all piping connections are properly aligned and securely fastened. Misaligned pipes can cause leaks and other issues.
- Monitor for Vibration: Excessive vibration can cause pipes to loosen or break. Use vibration dampeners or adjust the system to reduce vibrations.
Best Practices for Piping Maintenance
- Use High-Quality Fittings: Industrial fittings play a crucial role in maintaining the integrity of the piping system. Choose high-quality, corrosion-resistant fittings to ensure long-lasting performance.
- Regular Inspections: Conduct regular inspections of the entire piping system to identify and address issues before they become major problems.
- Follow Industry Standards: Adhere to industry standards and best practices for piping maintenance to ensure compliance and safety.
Filter Housing Seals
Types of Seals Used in Filter Housings
Seals are critical for maintaining a pressure-tight environment in high-pressure filter housings. Common types of seals used include:
- O-Rings: Elastomeric seals that fit into a groove and form a tight seal when compressed.
- Gasket Seals: Flat seals made of rubber, neoprene, or other materials that fit between mating surfaces.
- Metal Seals: Used in high-temperature and high-pressure applications, these seals provide a robust and durable seal.
Inspecting and Replacing Seals
Regular inspection of filter housing seals is essential to prevent leaks and ensure optimal performance. Here’s how to inspect and replace seals:
- Inspect for Wear and Tear: Look for signs of wear, such as cracks, deformation, or degradation. Replace any seals that show these signs.
- Clean the Sealing Surfaces: Thoroughly clean the surfaces where the seals are applied to remove any debris or contaminants.
- Apply Sealant: Use a high-quality sealant to ensure a tight seal. Follow the manufacturer's instructions for the type and amount of sealant to use.
- Install New Seals: Carefully install the new seals, ensuring they are properly seated and aligned. Use the correct tools to avoid damaging the seals.
- Test for Leaks: After reassembly, test the filter housing for leaks by gradually pressurizing the system and inspecting all connections.
Choosing the Right Seals
When selecting seals for your high-pressure filter housing, consider the following factors:
- Material Compatibility: Choose seals that are compatible with the fluid or gas being filtered and the materials of the housing.
- Temperature and Pressure Ratings: Ensure that the seals can withstand the operating temperatures and pressures of your system.
- Resistance to Chemicals and Contaminants: Select seals that are resistant to the chemicals and contaminants present in your application.
Leak Detection
Common Causes of Leaks
Leaks in high-pressure filter housings can occur due to various reasons, including:
- Worn or Damaged Seals: Seals that are not properly maintained or have reached the end of their lifespan can cause leaks.
- Improper Installation: Incorrectly installed seals or filter cartridges can lead to leaks.
- Corrosion: Corroded pipes or housing components can weaken the system and cause leaks.
- High Pressure: Excessive pressure can cause seals to fail or pipes to burst.
Methods for Leak Detection
There are several methods you can use to detect leaks in your high-pressure filter housing:
- Visual Inspection: Regularly inspect the system for visible signs of leaks, such as wet spots or standing fluids.
- Pressure Drop Monitoring: Monitor the pressure drop across the filter housing and piping system. A significant drop in pressure can indicate a leak.
- Tracer Gas Testing: Use a tracer gas to detect leaks. This method involves introducing a gas into the system and using a detector to find the source of any leaks.
- Ultrasonic Testing: Ultrasonic leak detection devices can identify leaks by detecting the ultrasonic noise produced by escaping gas or fluid.
Steps to Address Leaks
Once a leak is detected, it is crucial to address it promptly to prevent further damage. Follow these steps:
- Identify the Source: Determine the exact location of the leak. This may require disassembling parts of the system.
- Shut Down the System: Turn off the system and depressurize it to safely address the leak.
- Replace Faulty Components: Replace any worn or damaged seals, filter cartridges, or pipes that are contributing to the leak.
- Reassemble and Test: Reassemble the system and reapply any necessary sealants. Gradually pressurize the system and test for leaks using the methods mentioned above.
Conclusion
Maintaining high-pressure filter housings is a critical task that requires attention to detail and adherence to best practices. Regular filter cartridge replacement, proper piping maintenance, and diligent leak detection are essential to ensure the system operates efficiently and safely. By following the steps outlined in this guide, you can minimize downtime, reduce maintenance costs, and extend the lifespan of your high-pressure filter housing. Always prioritize safety and consult the manufacturer’s guidelines for specific maintenance requirements.